In this tutorial, we’ll discuss three easy ways to install FFmpeg on MacOS.
- Install FFmpeg with a Static Build
- Install FFmpeg with Homebrew
- Install FFmpeg via MacPorts
These installation methods work across all versions of the Mac operating system, e.g. MacOS High Sierra, MacOS Monterey, MacOS 13 Ventura, etc.
Pre-requirements
- The latest version of Mac OS - Ventura
- Admin/root access
Check if FFmpeg is pre-installed or not
-
Press command and space to open spotlight search, then type “terminal” and press enter to open it.
-
Run:
ffmpeg -version -
If it displays the command not found, you will have to install ffmpeg using the methods explained in this article.
Install FFmpeg via Static Build
The best feature of static builds is that they let you select and install the most recent releases and snapshots but on the same side whereas the application management is difficult as compared to other methods because we need to setup it up manually.
Step 1: Download FFmpeg
- Go to the official website to get the FFmpeg package.
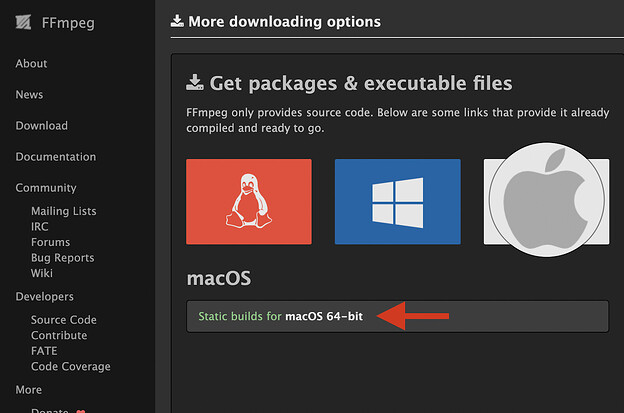
- Now, select the Apple logo under the Get packages & executable files section, and then, select the Static builds for macOS 64-bit link.
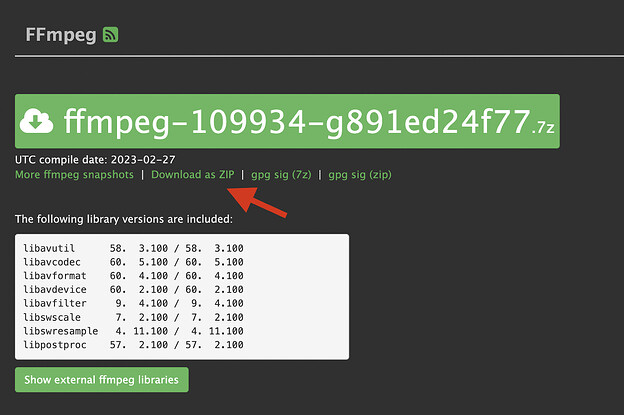
- Download the latest snapshot by clicking on Download as ZIP on the left side.
Step 2: Unzip and Move FFmpeg Binary
Once the download is finished successfully, perform the following steps:
- Unzip the download file by double-clicking on it.
- Locate the unzipped file in the directory of your choice and note its path.
Step 3: Add path to FFmpeg
- Add the noted path in the previous step in the path variable using the terminal
- For example, if the path FFmpeg binary is in
/Users/test/local, type: export PATH=$PATH:/Users/test/Local
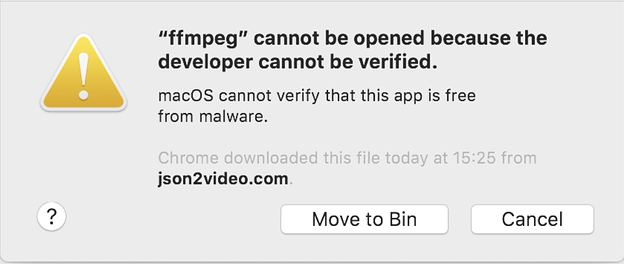
- Type ffmpeg in the terminal and see what happened. The Mac OSX security system will stop it.
- To overcome this situation, type
ffmpeg –versionin the command line, and the popup window will open.
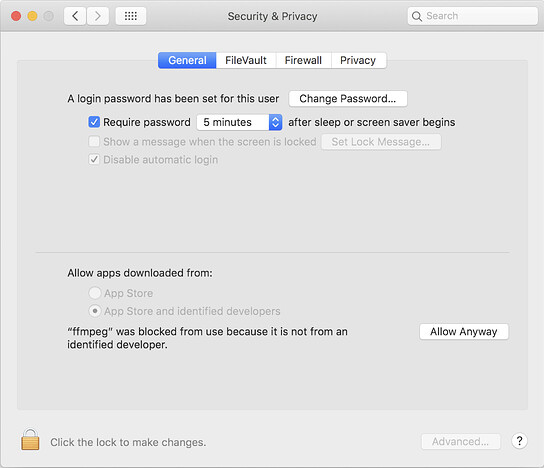
- Press cancel and now, open the
System Preferences→Security&Privacy→Allow anyways button.
Step 3: Verify
Run the below-mentioned command if it shows the ffmpeg version then, it means FFmpeg is installed properly.
ffmpeg -version
Install FFmpeg using Homebrew
On macOS, the homebrew package manager is mostly used for downloading and installing new software and updates for already installed programs.
The first step is to ensure Homebrew is installed and is up to date.
Step 1: Install Homebrew
- Open the command-line interface and paste the following command.
/bin/bash -c "$(curl -fsSLhttps://raw.githubusercontent.com/Homebrew/install/HEAD/install.sh)"- If you’re curious about what this command will do internally, read this documentation.
Step 2: Update and Upgrade Homebrew
-
Use the given command to update the homebrew packages on your computer.
brew update -
Now, if you want to install the outdated package then use:
brew upgrade
Step 3: Install FFmpeg on your system
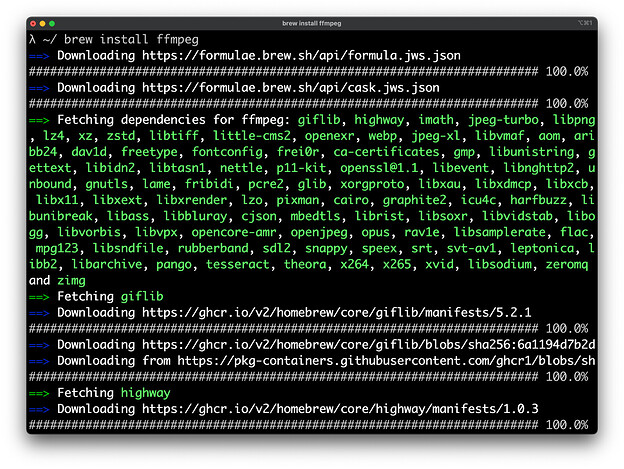
Type this command to download the brand-new version of FFmpeg available. Homebrew will automatically load the required tools and dependencies.
brew install ffmpeg
Another way is to install the latest version of FFmpeg from Git Master
To obtain the most recent package for the FFmpeg Git master version, use the command listed below. Make sure the command includes the -- HEAD flag.
brew install ffmpeg --HEAD
Step 4: Verification
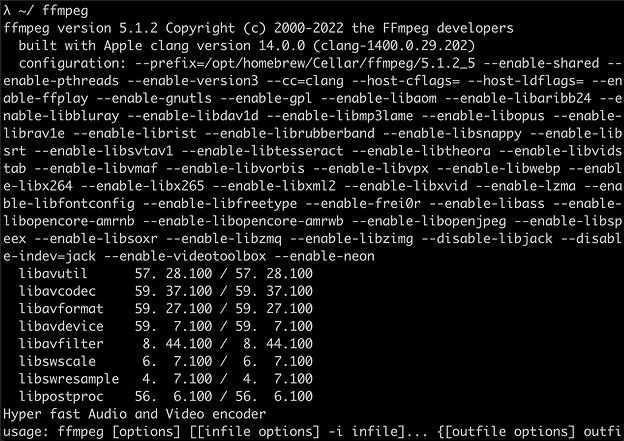
Use ffmpeg in the command prompt to verify the installation, if done correctly, it will show the configuration options.
Install FFmpeg using MacPorts
MacPorts pancake manager allows you to set up FFmpeg on mac without homebrew.
Step 1: Install MacPorts
Refer to this guide to install the MacPorts package manager on your computer.
Step 2: Configure FFmpeg
-
Now, execute the following command in the terminal to install FFmpeg.
sudo port install ffmpeg
- Enter Y to continue the process.
Congratulations! you have successfully installed FFmpeg on your Mac.

